
The Master Blueprint: How to Cook Chicken Breast Without Drying It Out
The chicken breast is often regarded as the most difficult cut of poultry to execute perfectly. While it is a nutritional powerhouse—packed with lean protein and minimal saturated fat—its lack of connective tissue and intramuscular fat means the window between “perfectly done” and “unpalatably dry” is incredibly narrow. Achieving the moist, succulent interior and beautifully seared exterior seen in professional culinary settings requires more than just heat; it requires a strategic application of science-based cooking principles.
The Molecular Science of Moisture Loss
To solve the problem of dry chicken, one must first understand why it happens. Chicken breast muscle is composed of long fibers held together by delicate proteins. As heat is applied, these proteins begin to denature and contract.
- 140°F to 150°F: The proteins tighten, beginning to squeeze out the water contained within the cells.
- Above 155°F: The contraction becomes aggressive. By the time a breast reaches the USDA-recommended 165°F, it has often lost nearly 30% of its moisture.
- Carryover Cooking: Heat continues to move from the outside of the meat to the center even after it is removed from the pan. To achieve a final safe temperature of 165°F without overshooting into dryness, professional technique dictates removing the meat at 160°F and letting it rest.
Phase 1: Essential Preparation Techniques
The most successful results begin long before the chicken touches a hot pan. Utilizing these three foundational techniques will significantly increase your margin for error.
1. The Power of the Pound (Uniformity)
A natural chicken breast is tapered—thick at one end and thin at the other. By the time the thick end is safe to eat, the thin end is inevitably overcooked and rubbery.
- The Fix: Place the breast between two sheets of plastic wrap or in a heavy-duty bag. Use a meat mallet or a heavy rolling pin to gently pound the thickest part until the entire breast is a uniform 3/4-inch thickness. This ensures every square inch of the meat finishes cooking at the exact same moment.
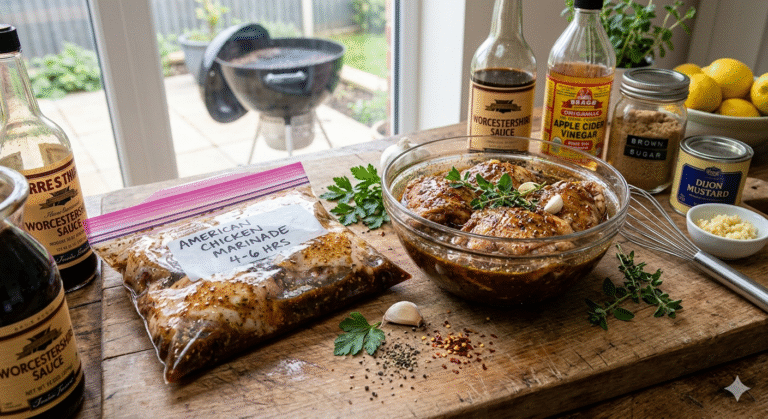
2. The Dry Brine (Moisture Retention)
Salting your chicken at least 30 minutes before cooking (and up to 24 hours) is the ultimate insurance policy.
- The Chemistry: Salt draws moisture out initially, but then dissolves certain muscle proteins, creating a gel-like structure that re-absorbs the liquid and traps it. This modified protein structure is more resistant to contracting when heated, allowing the meat to stay juicy even if it accidentally spends an extra minute on the heat.
3. Surface Dehydration (The Crust)
Moisture is the enemy of the Maillard reaction (browning). If the surface of the chicken is wet, the energy from the pan will go toward evaporating that water rather than searing the meat.
- The Fix: Always pat your chicken breasts “bone-dry” with paper towels immediately before seasoning and cooking.
Phase 2: The Pan-Sear and Butter Baste Method
This method, frequently utilized in high-end restaurants, combines high-intensity searing with a gentle finish to produce the result seen in professional photography.
Ingredients
- Chicken: 2 boneless, skinless chicken breasts (pounded to even thickness).
- Fats: 1 tbsp high-smoke point oil (avocado or grapeseed) and 2 tbsp unsalted butter.
- Aromatics: 3 sprigs of fresh rosemary, 4 sprigs of fresh thyme, and 2 crushed garlic cloves.
- Seasoning: Kosher salt and freshly cracked black pepper.
Execution Steps
- Initial Sear: Heat your skillet (cast iron is preferred for heat retention) over medium-high heat. Once the oil shimmers, lay the chicken in the pan. Press down slightly to ensure maximum surface contact. Sear undisturbed for 5 minutes until a golden-brown crust forms.
- The Flip: Flip the breasts. Immediately reduce the heat to medium-low.
- The Baste: Add the butter, garlic, rosemary, and thyme to the pan. As the butter melts and foams, tilt the pan and use a large spoon to continuously pour the hot, herb-infused butter over the chicken for the final 4 to 5 minutes. This acts as a gentle poaching method that finishes the interior without drying the exterior.
- The Temperature Check: Use an instant-read thermometer. Pull the chicken when it reaches 160°F.
Phase 3: The Resting Period (Non-Negotiable)
Resting is not just a suggestion; it is a mechanical necessity for juicy meat. During cooking, the muscle fibers tighten and push juices toward the center. If you slice the chicken immediately, those juices will run out onto the board, leaving the meat dry.
- Protocol: Transfer the chicken to a warm wooden board or a room-temperature plate. Let it rest for 8 to 10 minutes. This allows the fibers to relax and re-absorb the moisture, ensuring every slice is as succulent as the center.
Advanced Troubleshooting
- Problem: The exterior is burnt but the center is raw.
- Solution: Your pan was too hot. Use medium-high for the initial sear, then drop the temperature for the second half of cooking.
- Problem: The chicken feels “rubbery” or “bouncy.”
- Solution: This is a symptom of overcooking. The proteins have contracted too tightly. Use a digital thermometer to ensure you never exceed a final rested temperature of 165°F.
- Problem: The meat is bland in the middle.
- Solution: You didn’t brine or season early enough. Salt needs time to penetrate the density of a chicken breast.
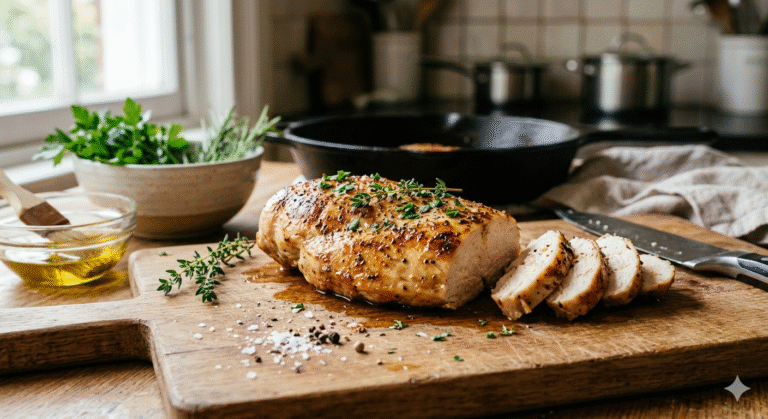
By mastering the combination of uniform thickness, the dry brine, and the butter-basting technique, you can consistently serve chicken breast that is tender, moist, and flavorful. As seen in the provided culinary setup, garnishing with fresh herbs and a final sprinkle of flaky salt provides the perfect textural and aromatic finish to a technically perfect dish.
Nutritional Quick-Reference (Per 6 oz Serving)
- Calories: ~280 kcal
- Protein: 52g
- Total Fat: 6g
- Carbohydrates: 0g
- This high-performance protein, when cooked correctly, remains one of the most efficient and delicious foundations of a healthy diet.